Camping and Photography at Black Balsam Knob

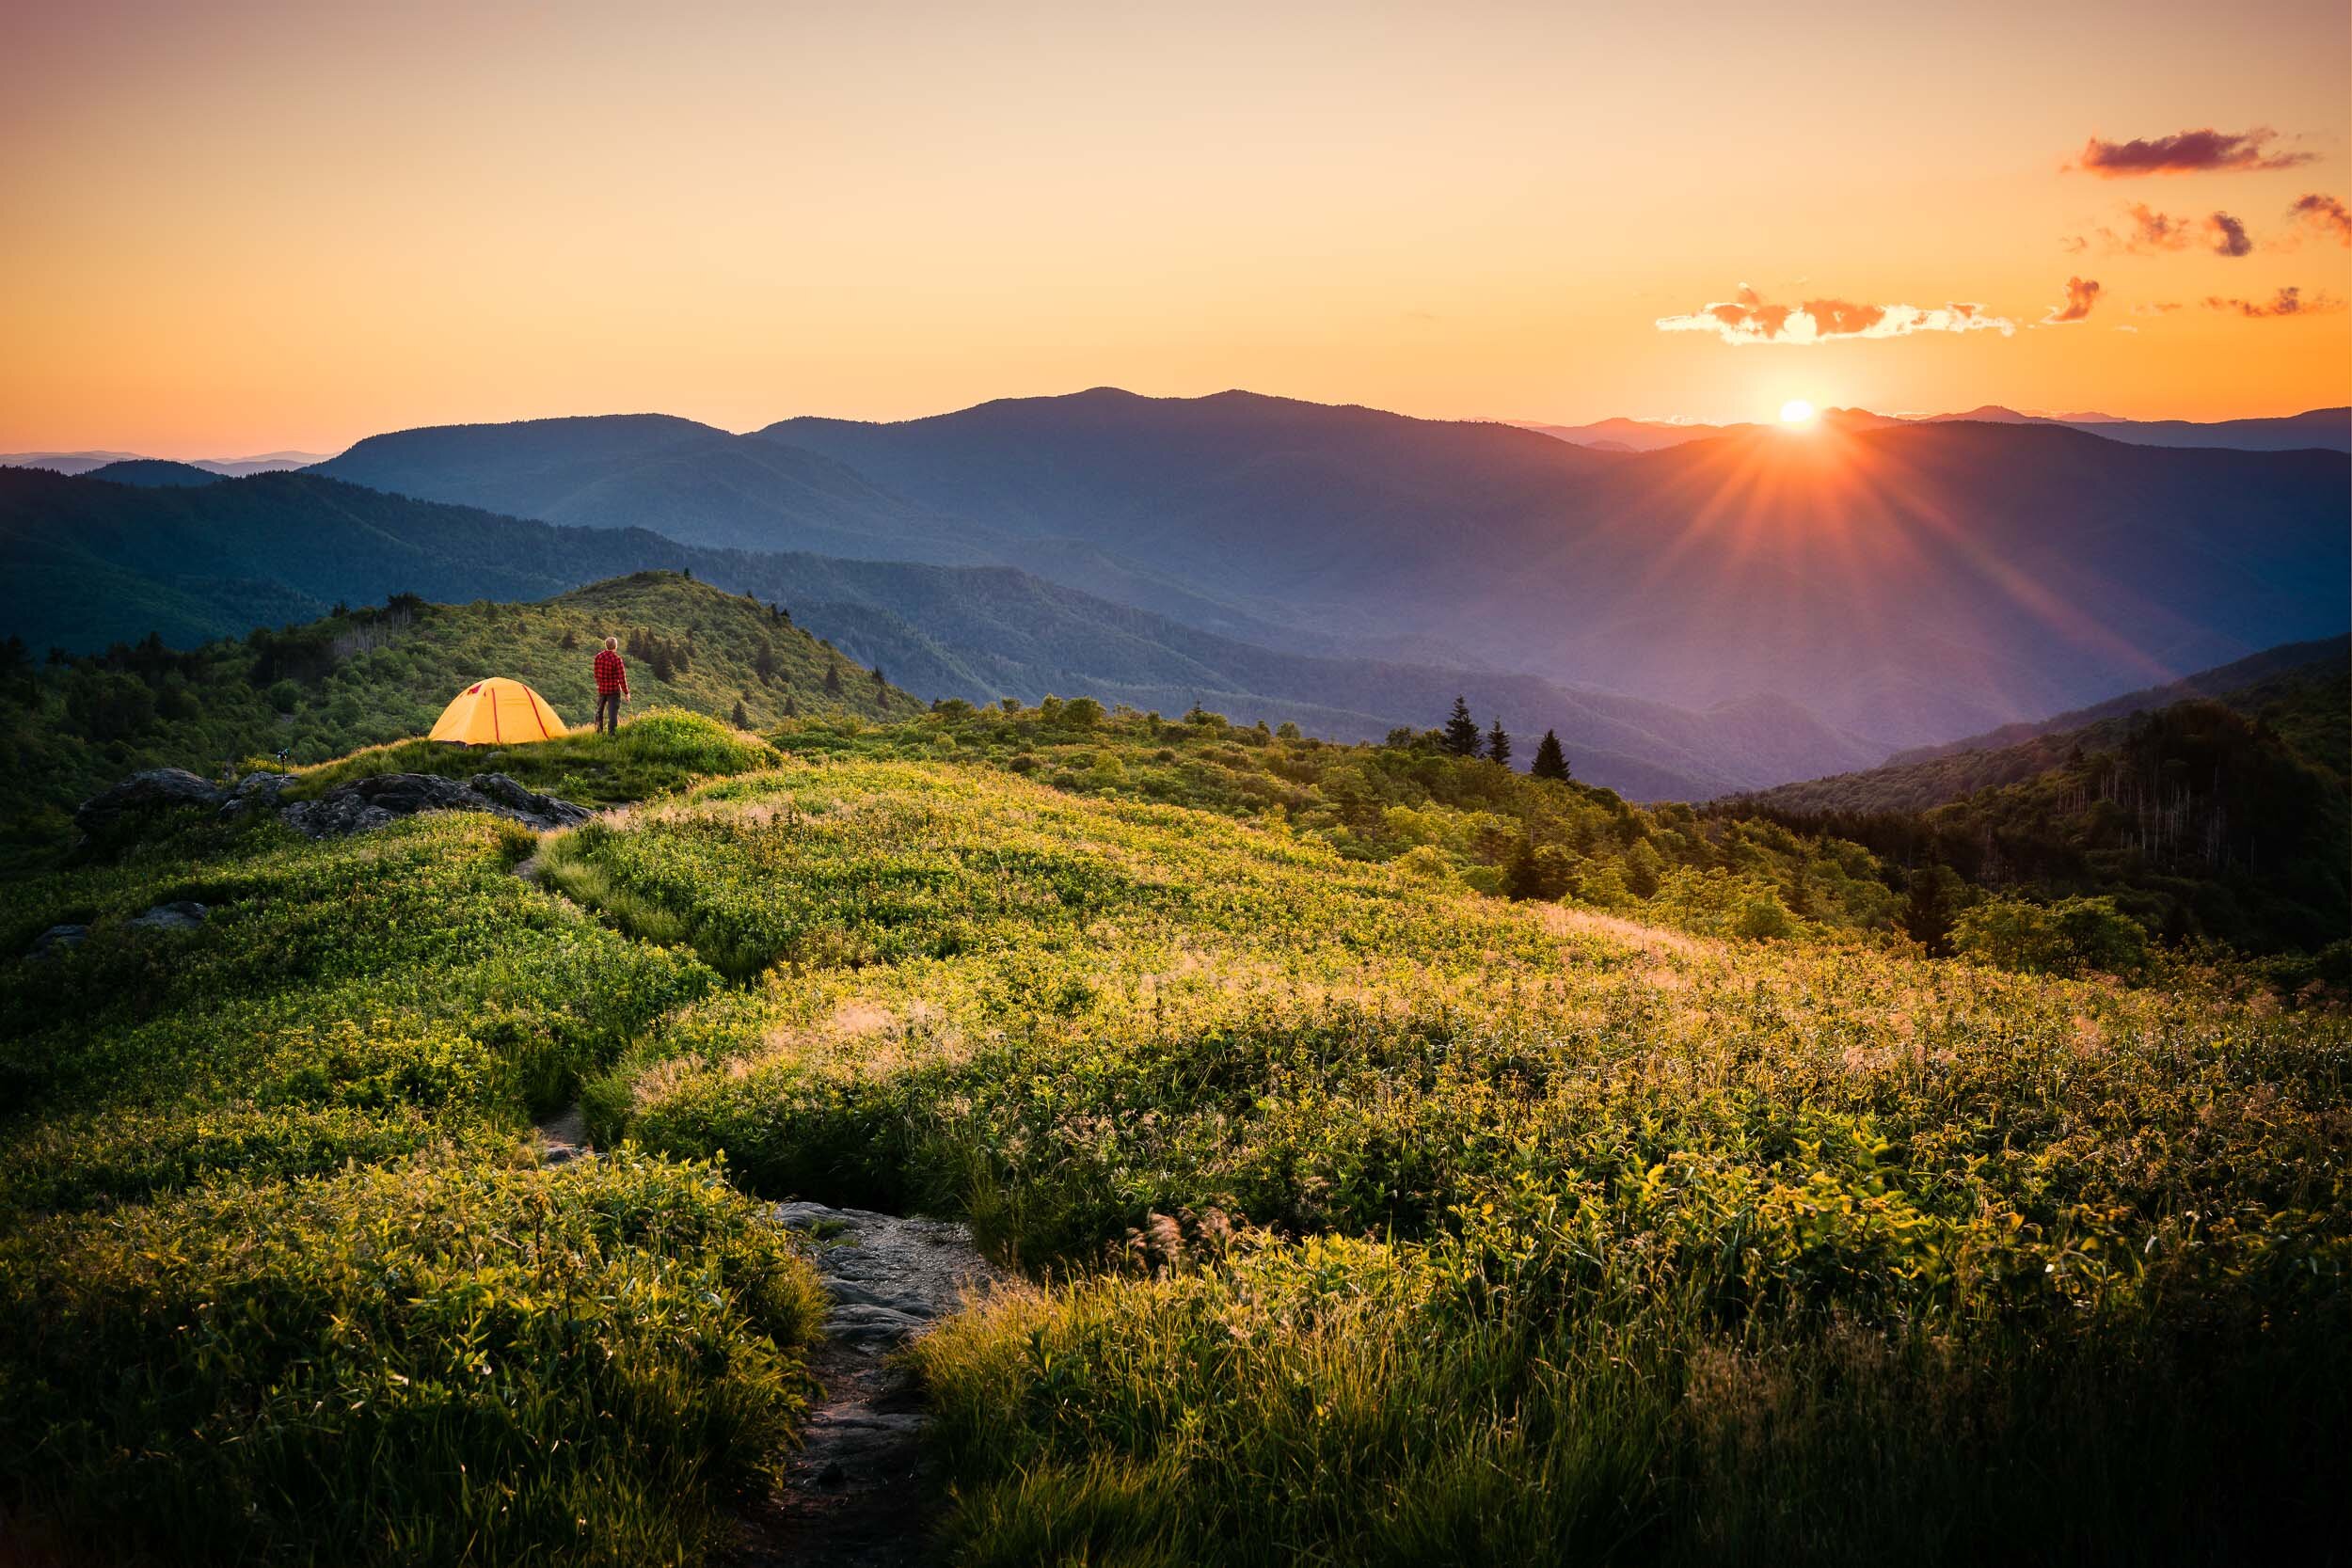
Everyone loves a 360 degree mountain top view! Unfortunately in North and South Carolina these are hard to find. Many of the mountains are covered in trees and the views out are usually limited. This is why it is so special when you hike the Art Loeb trail in the Black Balsam Knob. The views are amazing in every direction!

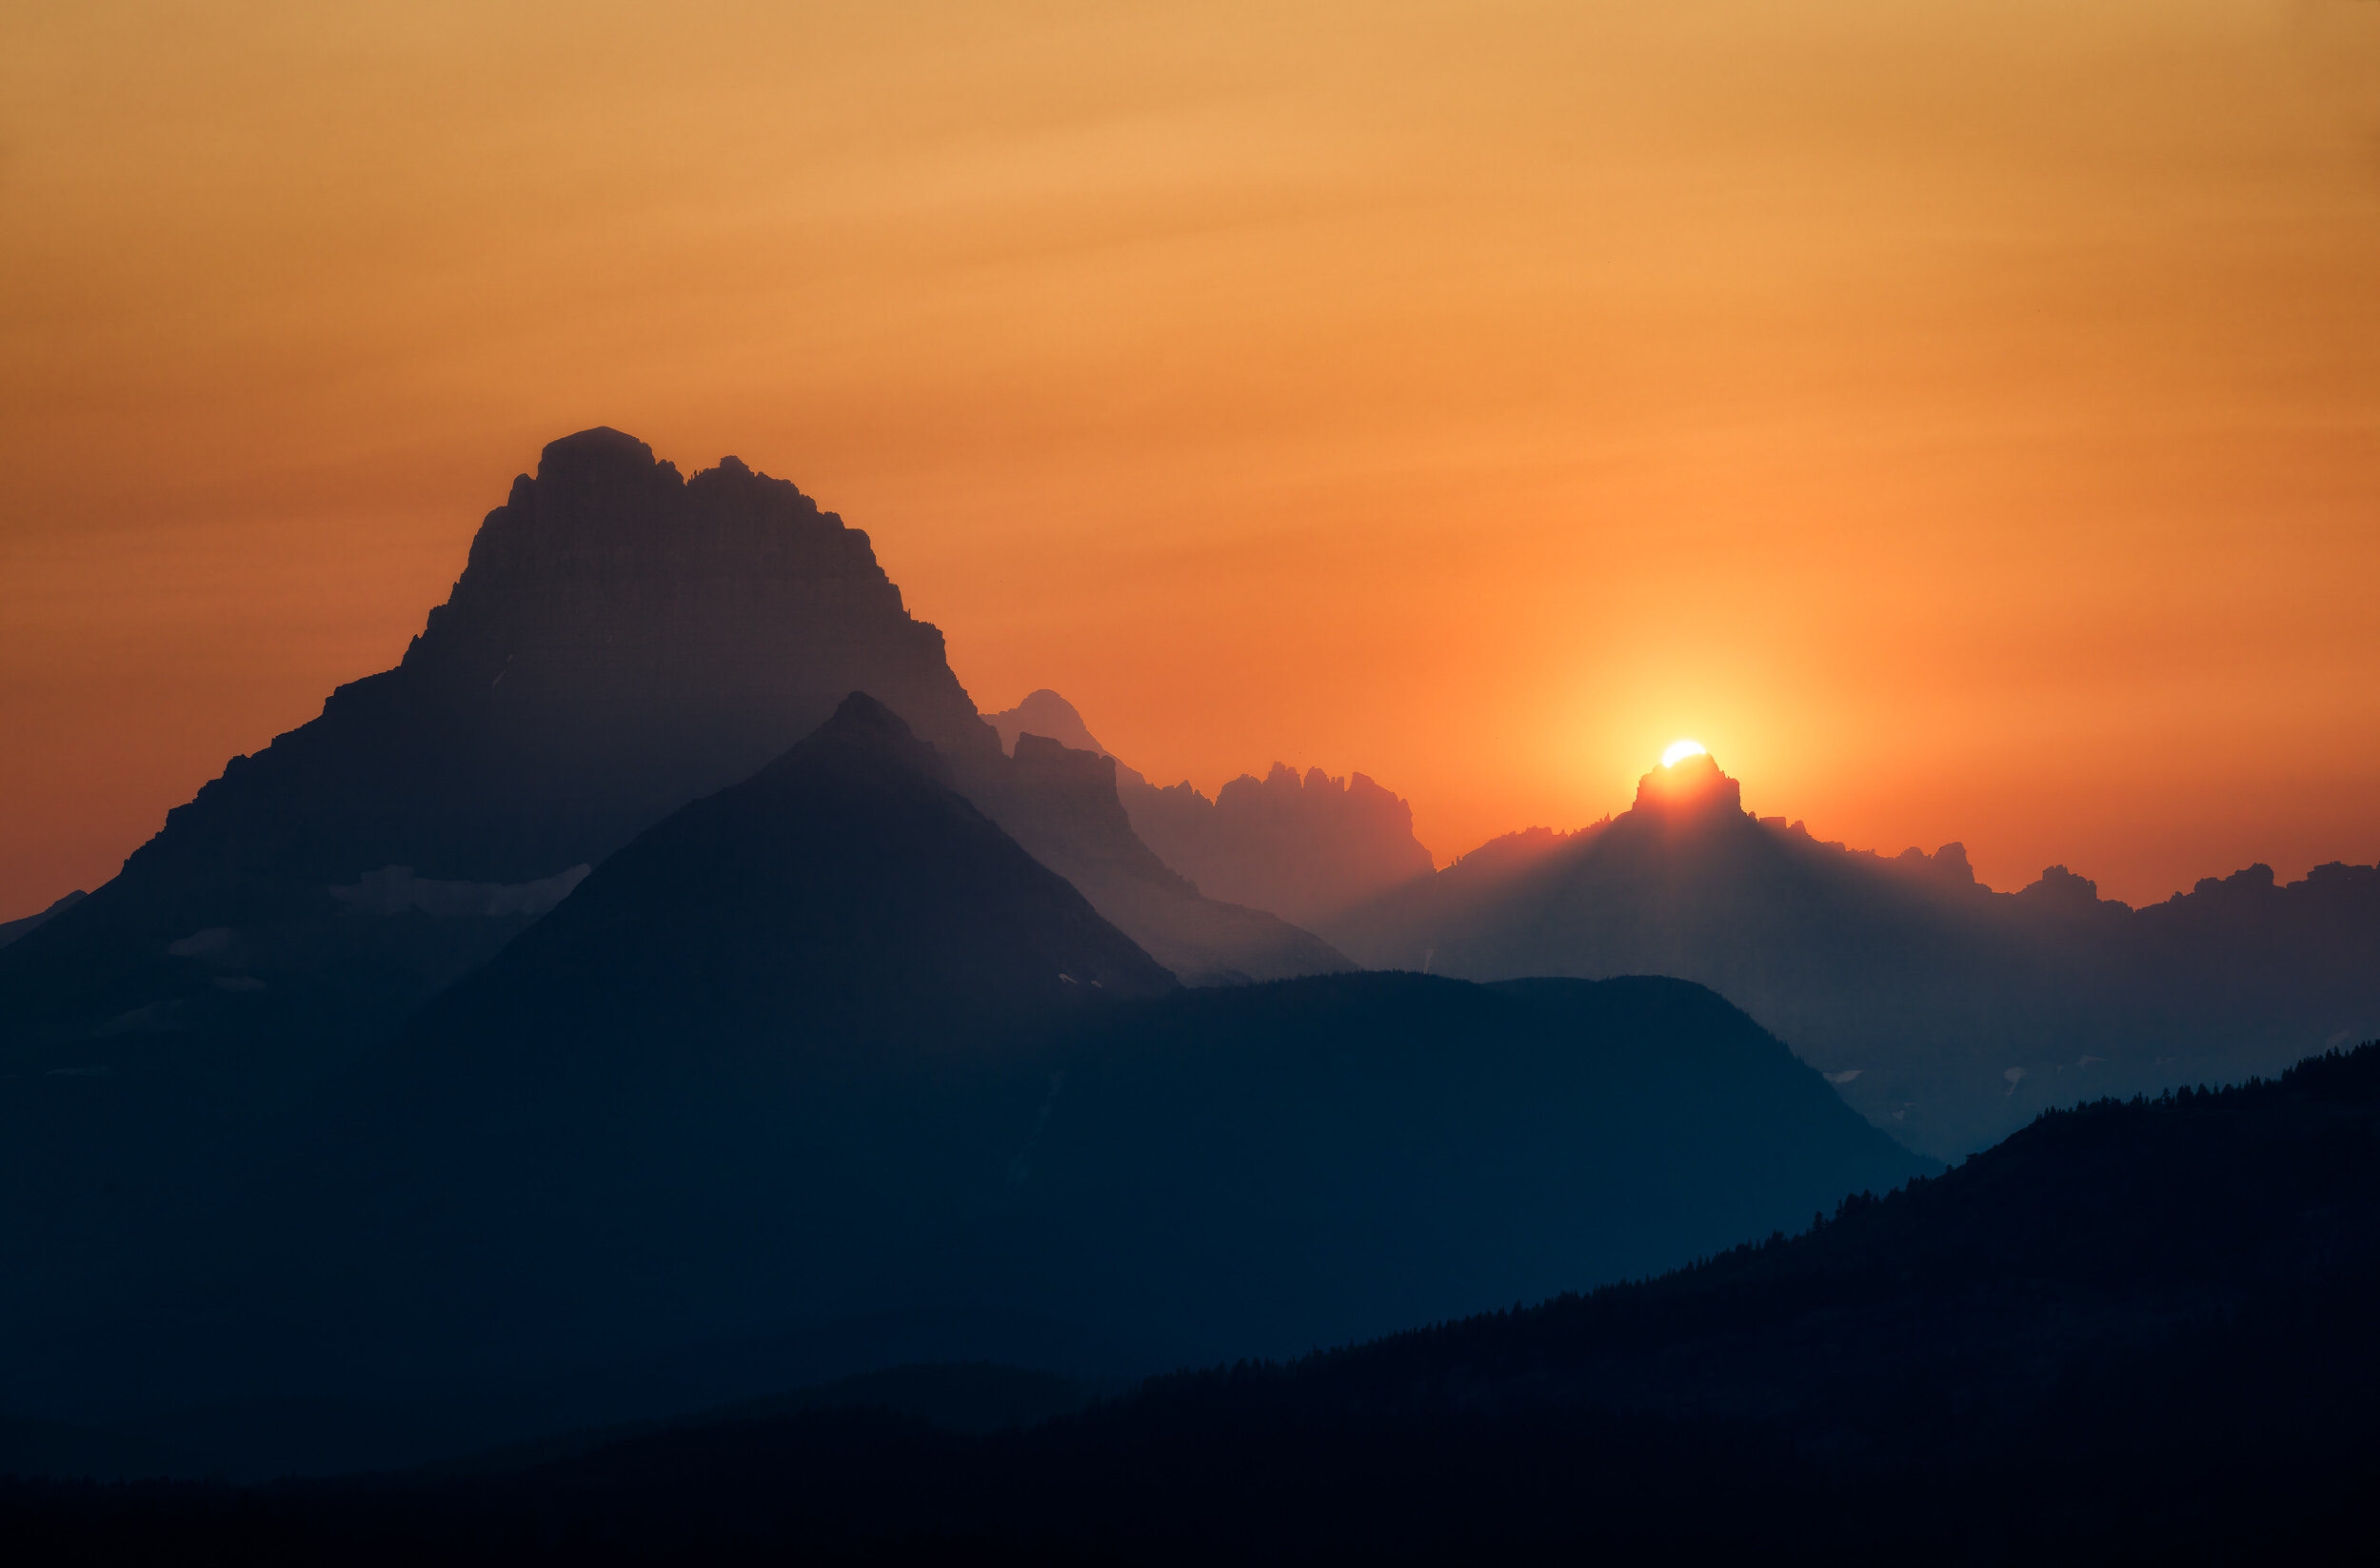
Sunrise on the Art Loeb Trail

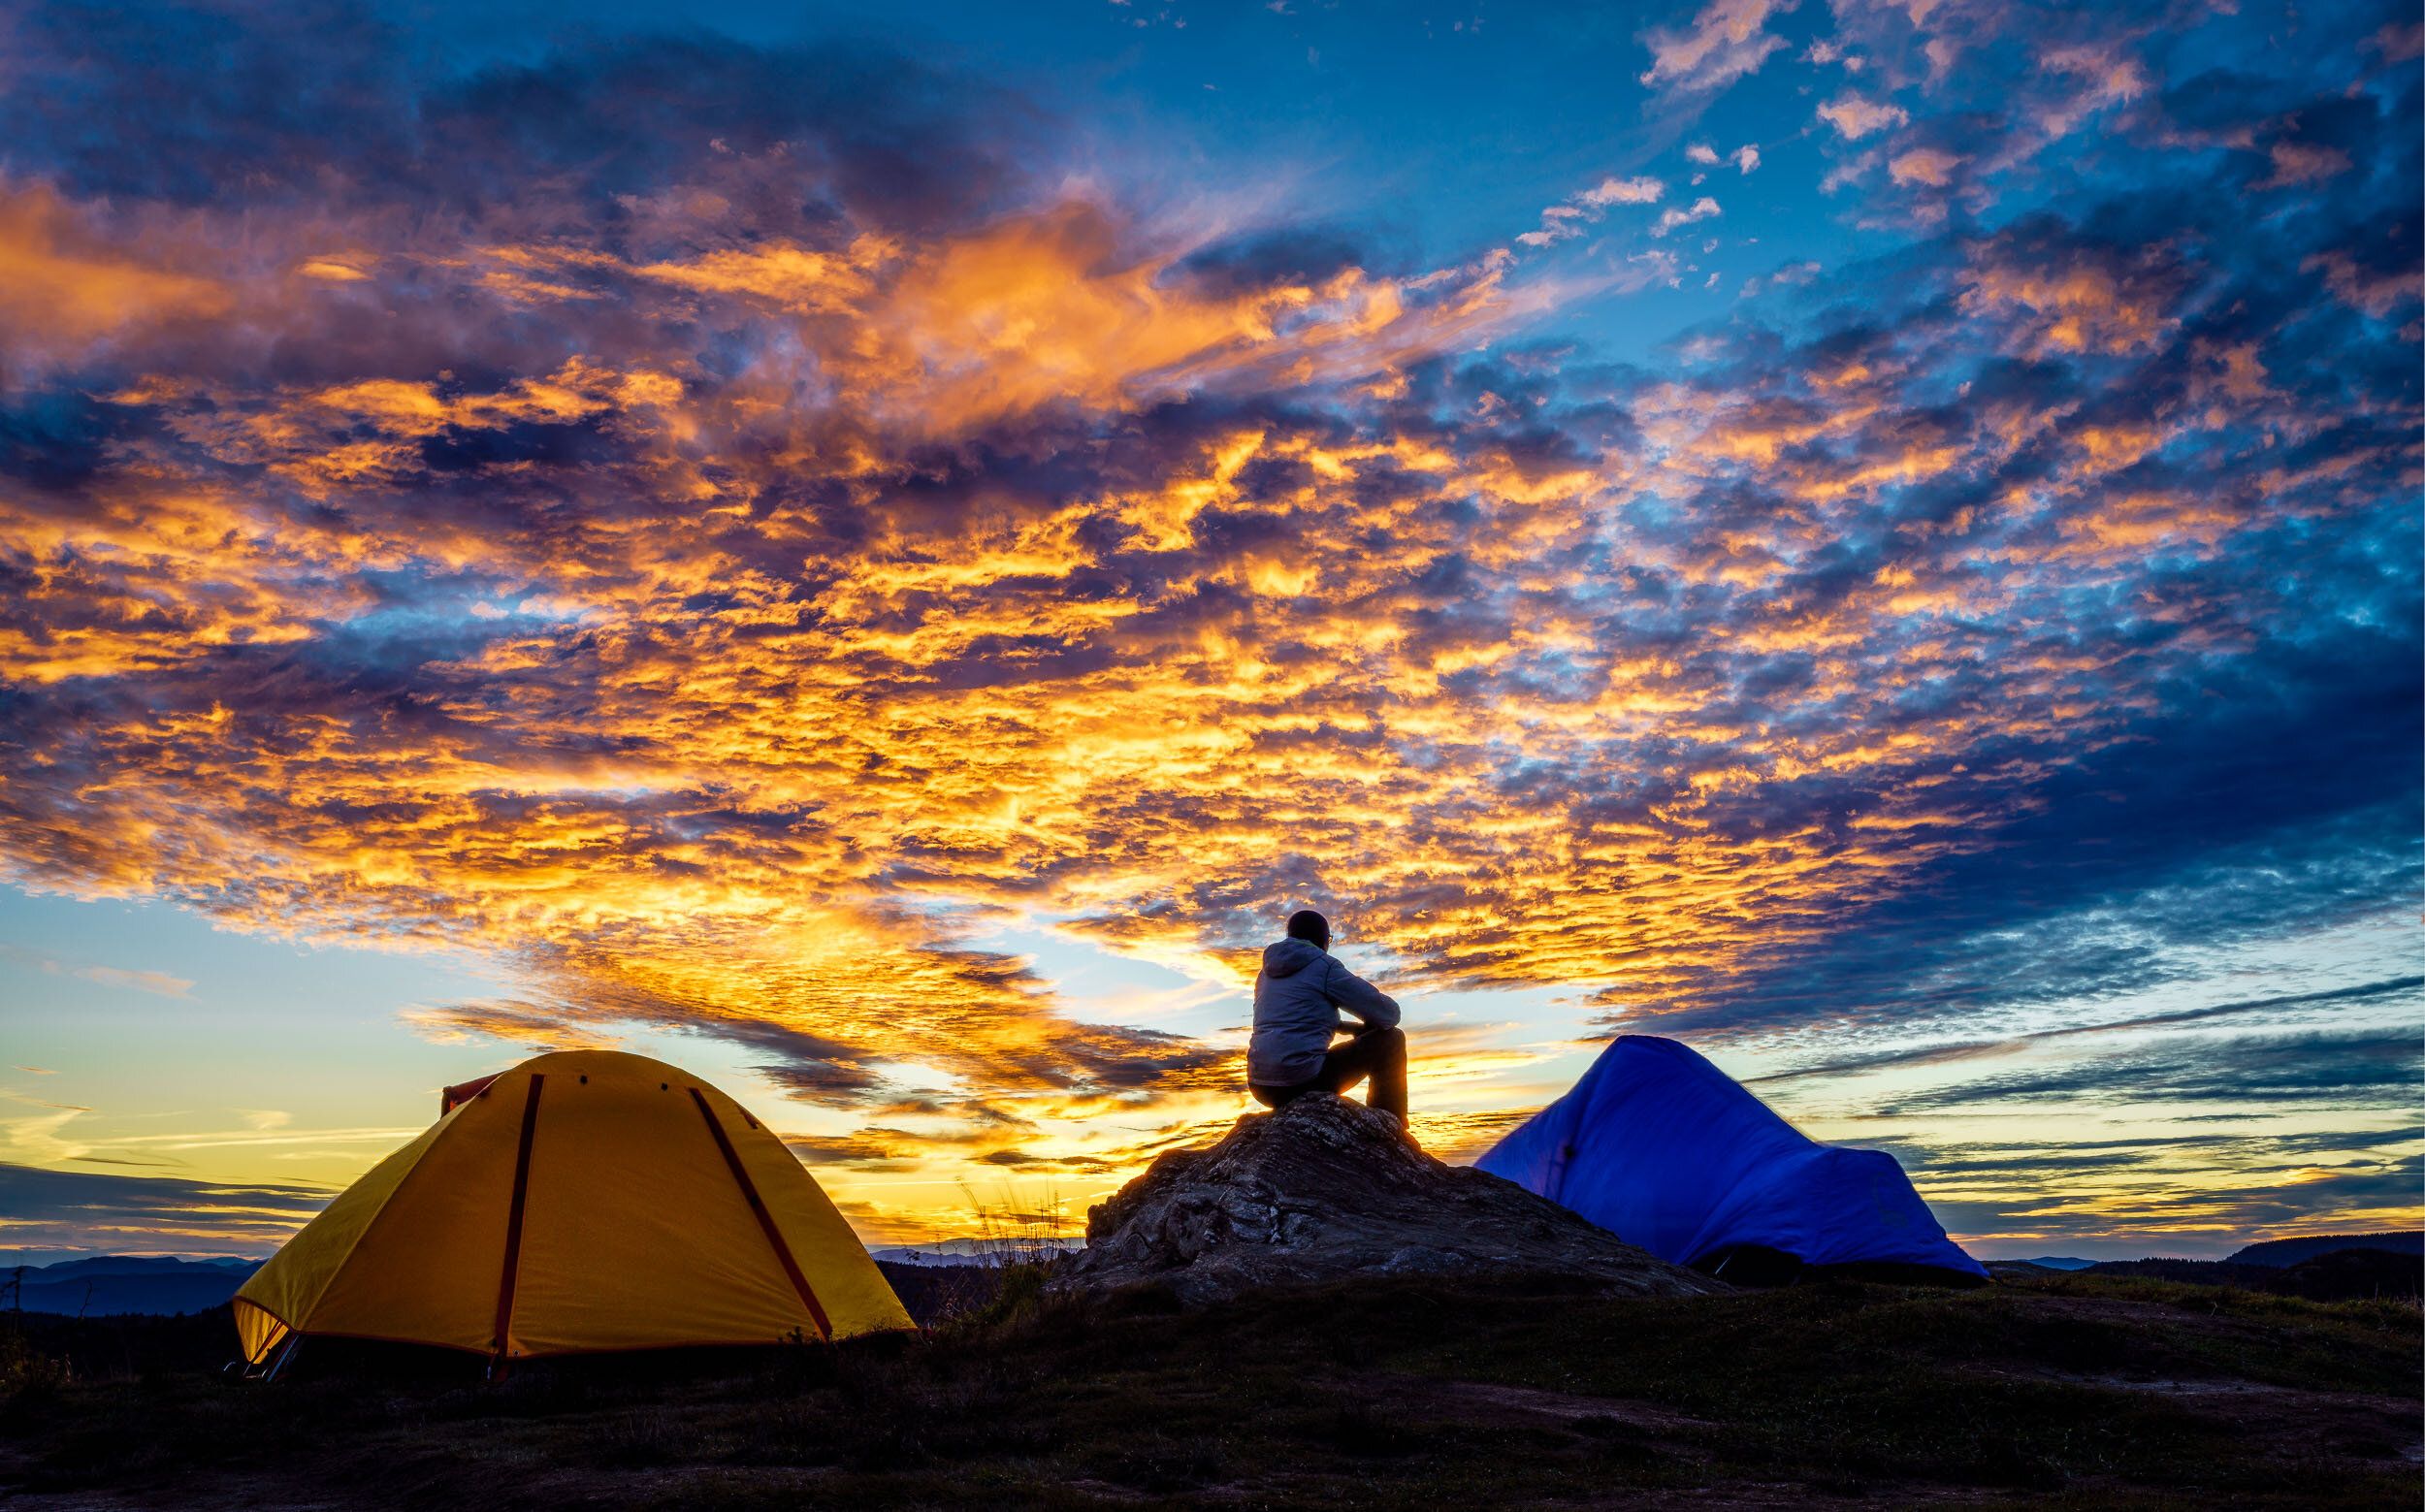
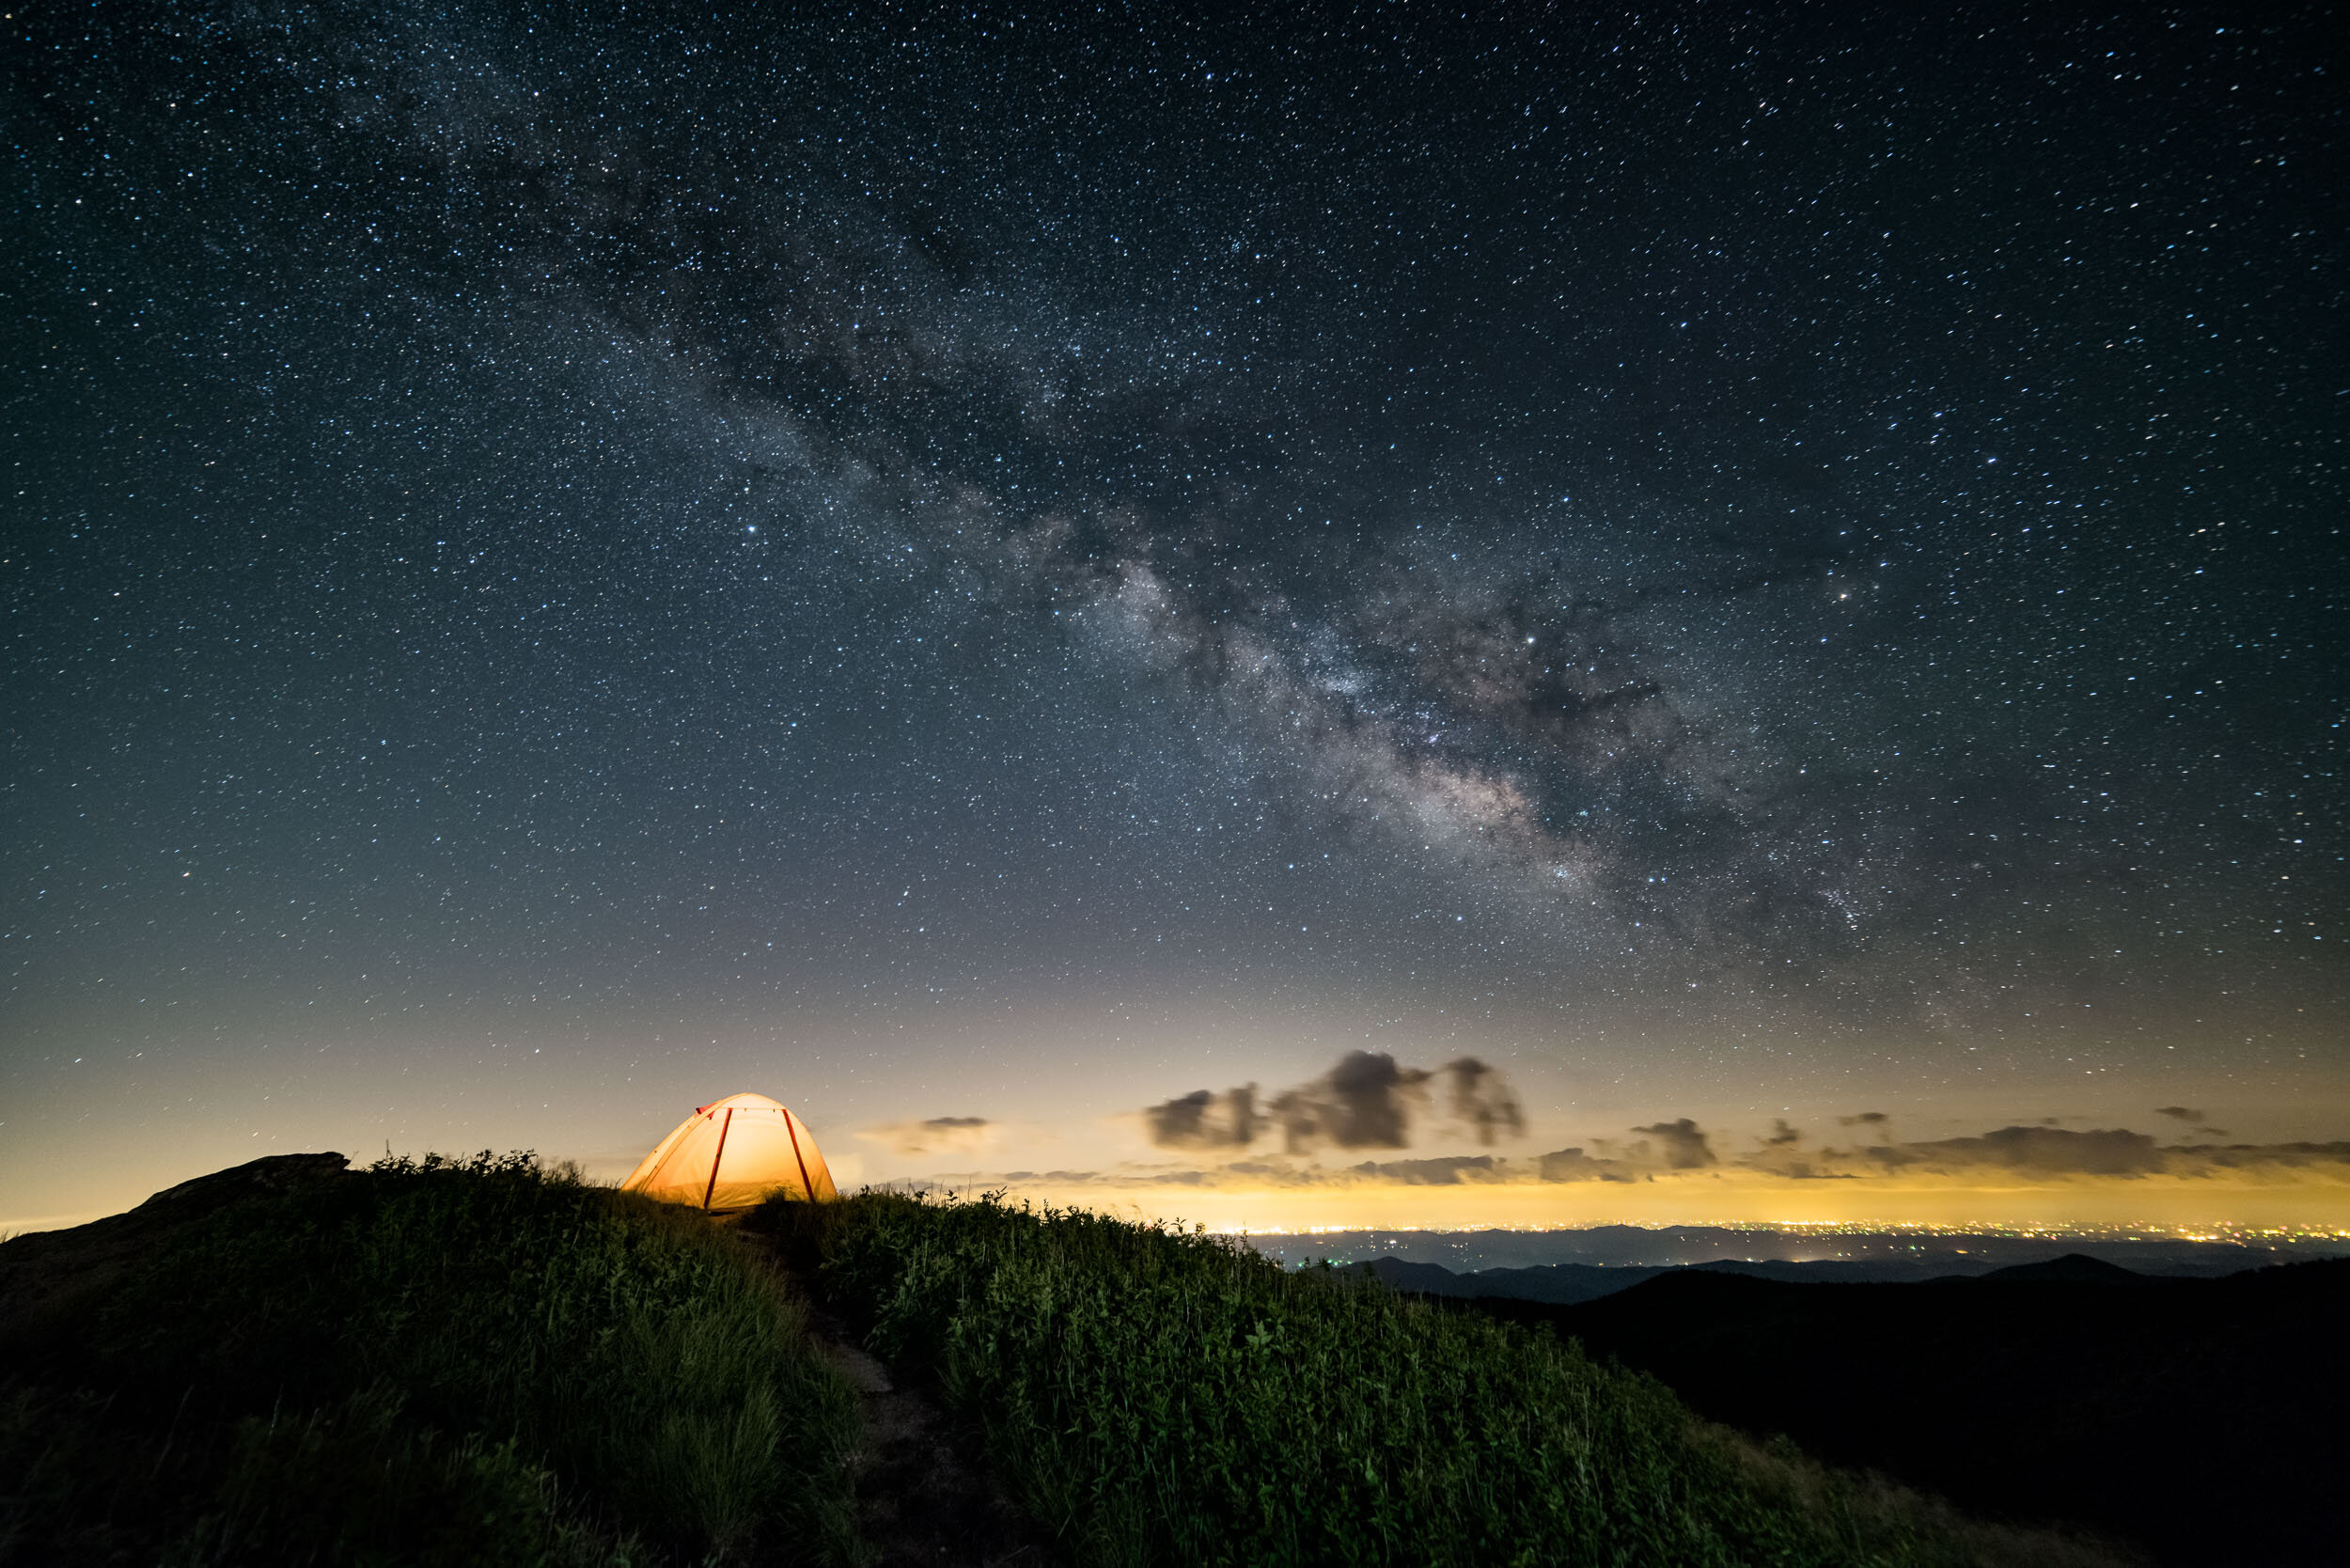
What’s even better is the area is open to dispersed camping with many campsites along the Art Loeb Trail from Black Balsam Knob all the way to Shining Rock. You can find completely exposed, mountain top sites (beware of storms and wind) as well as sheltered campsites in groves of trees.

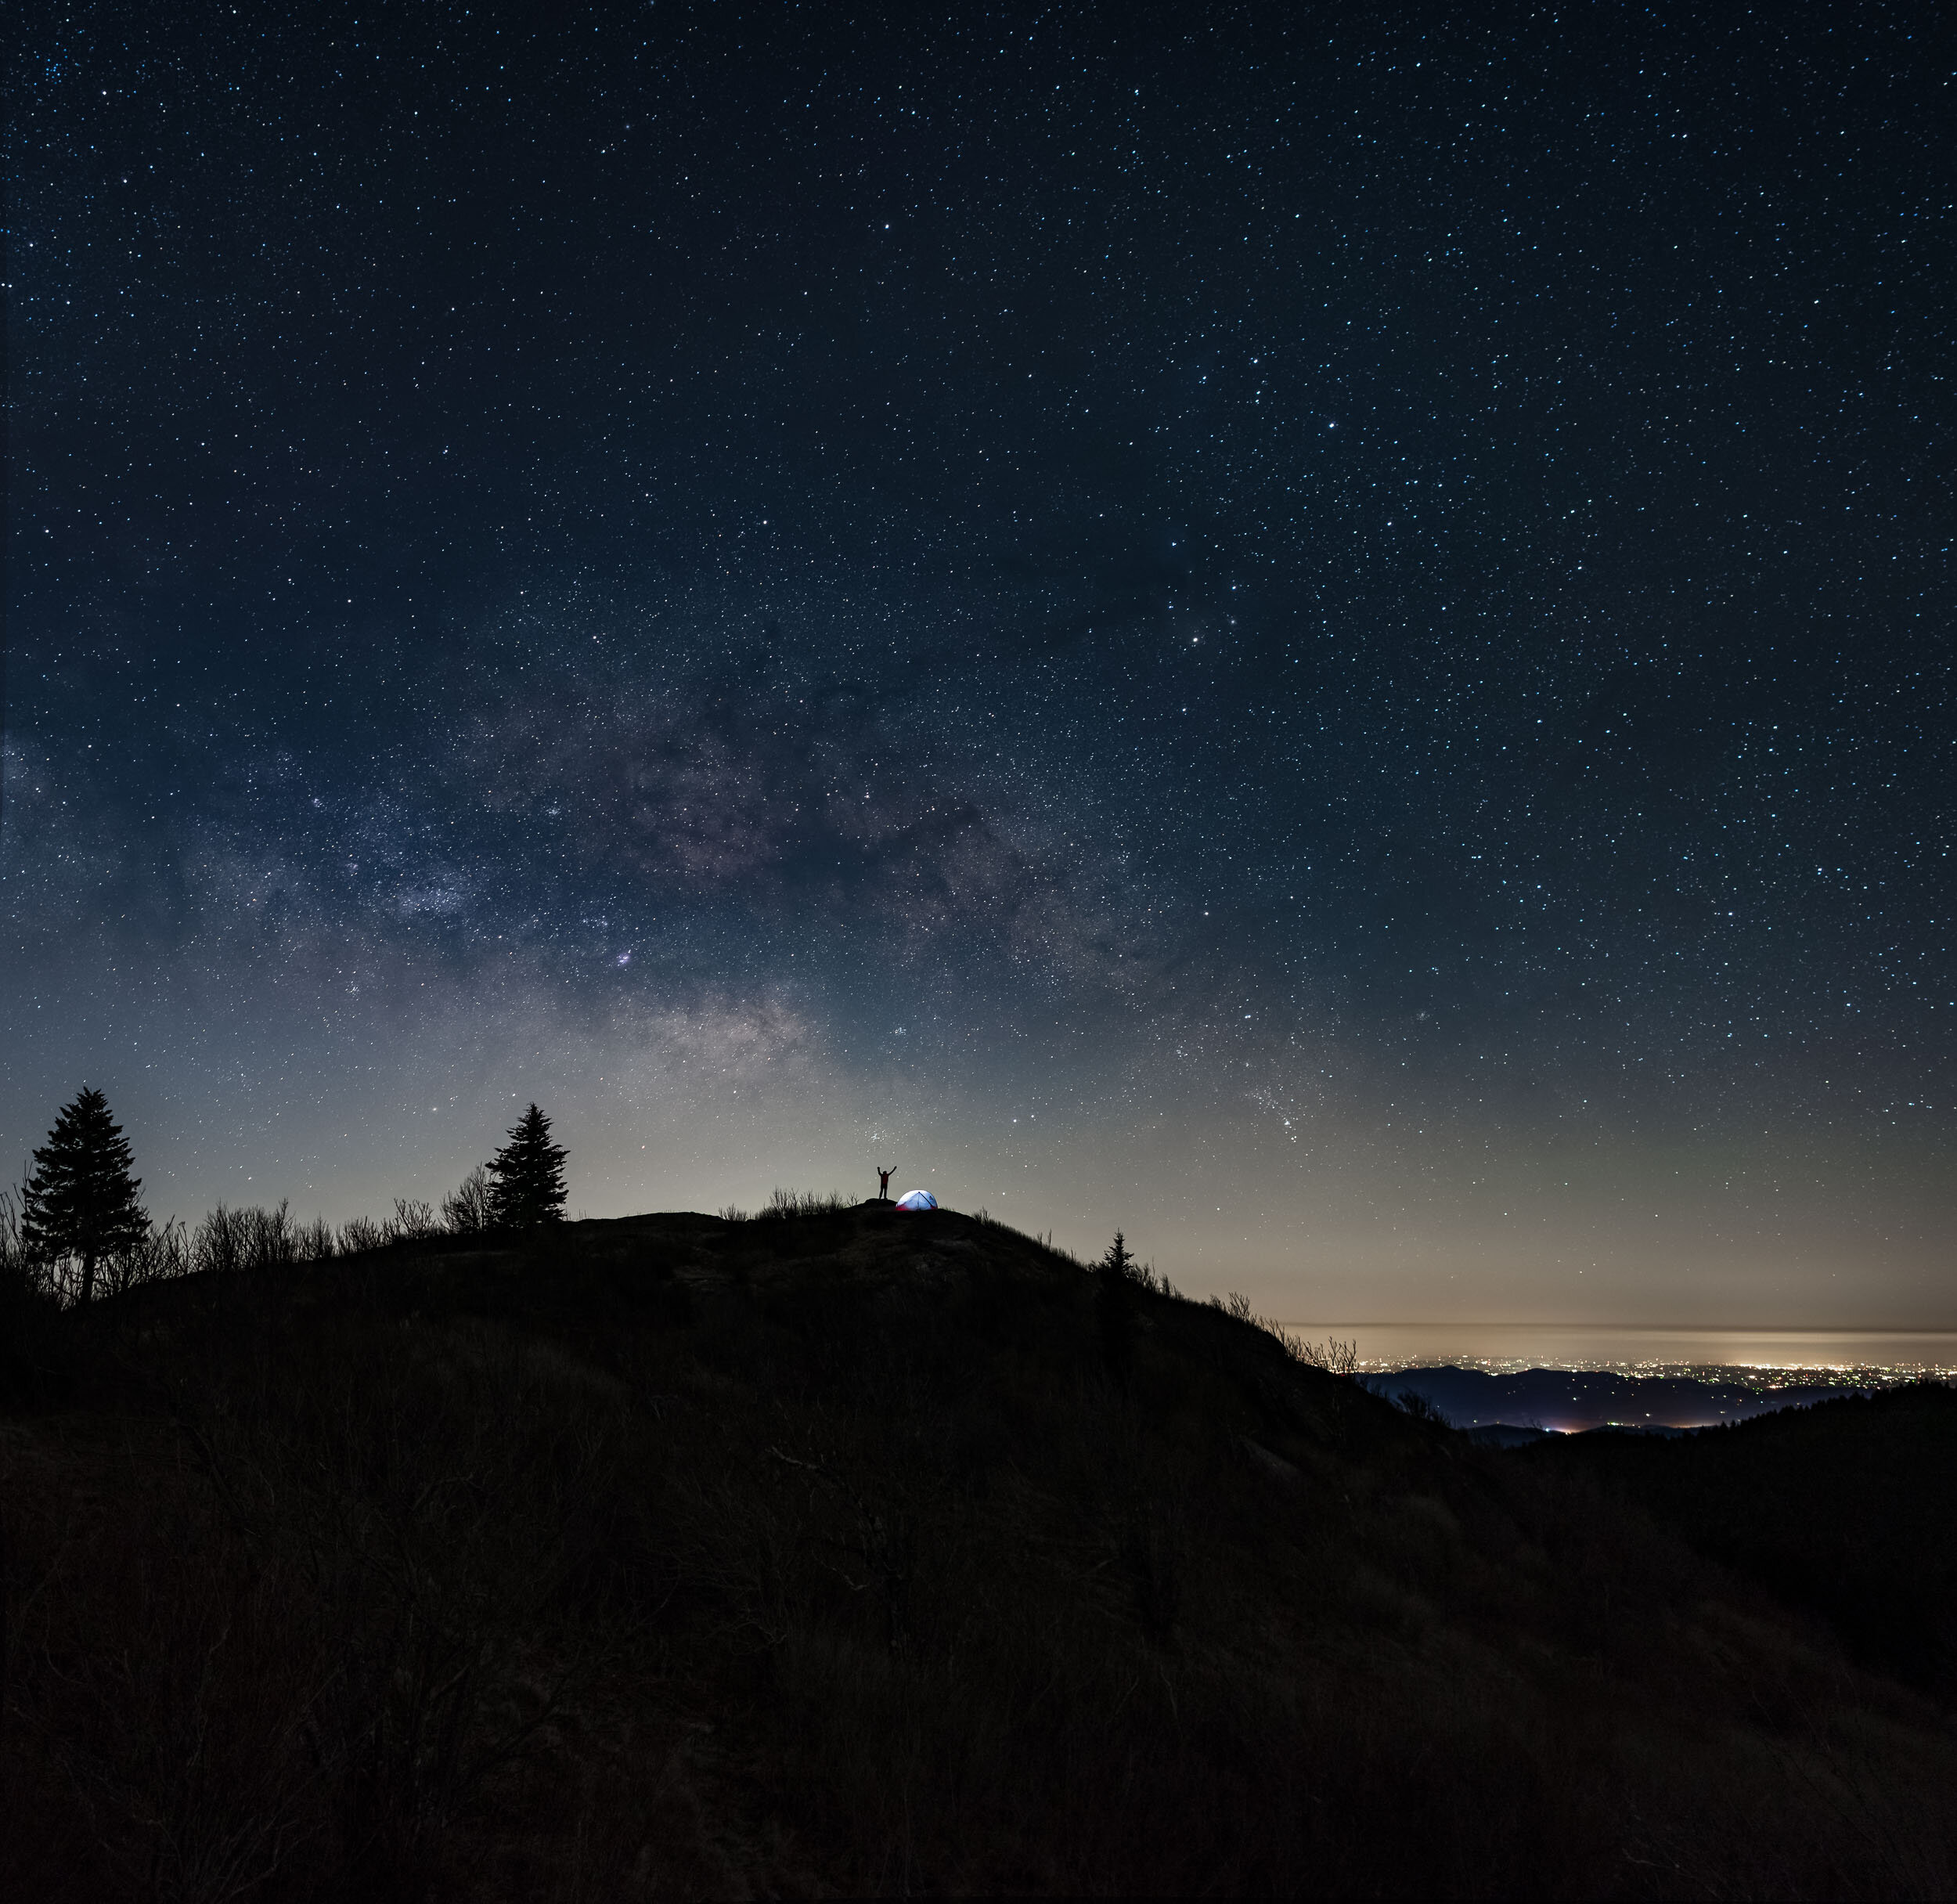
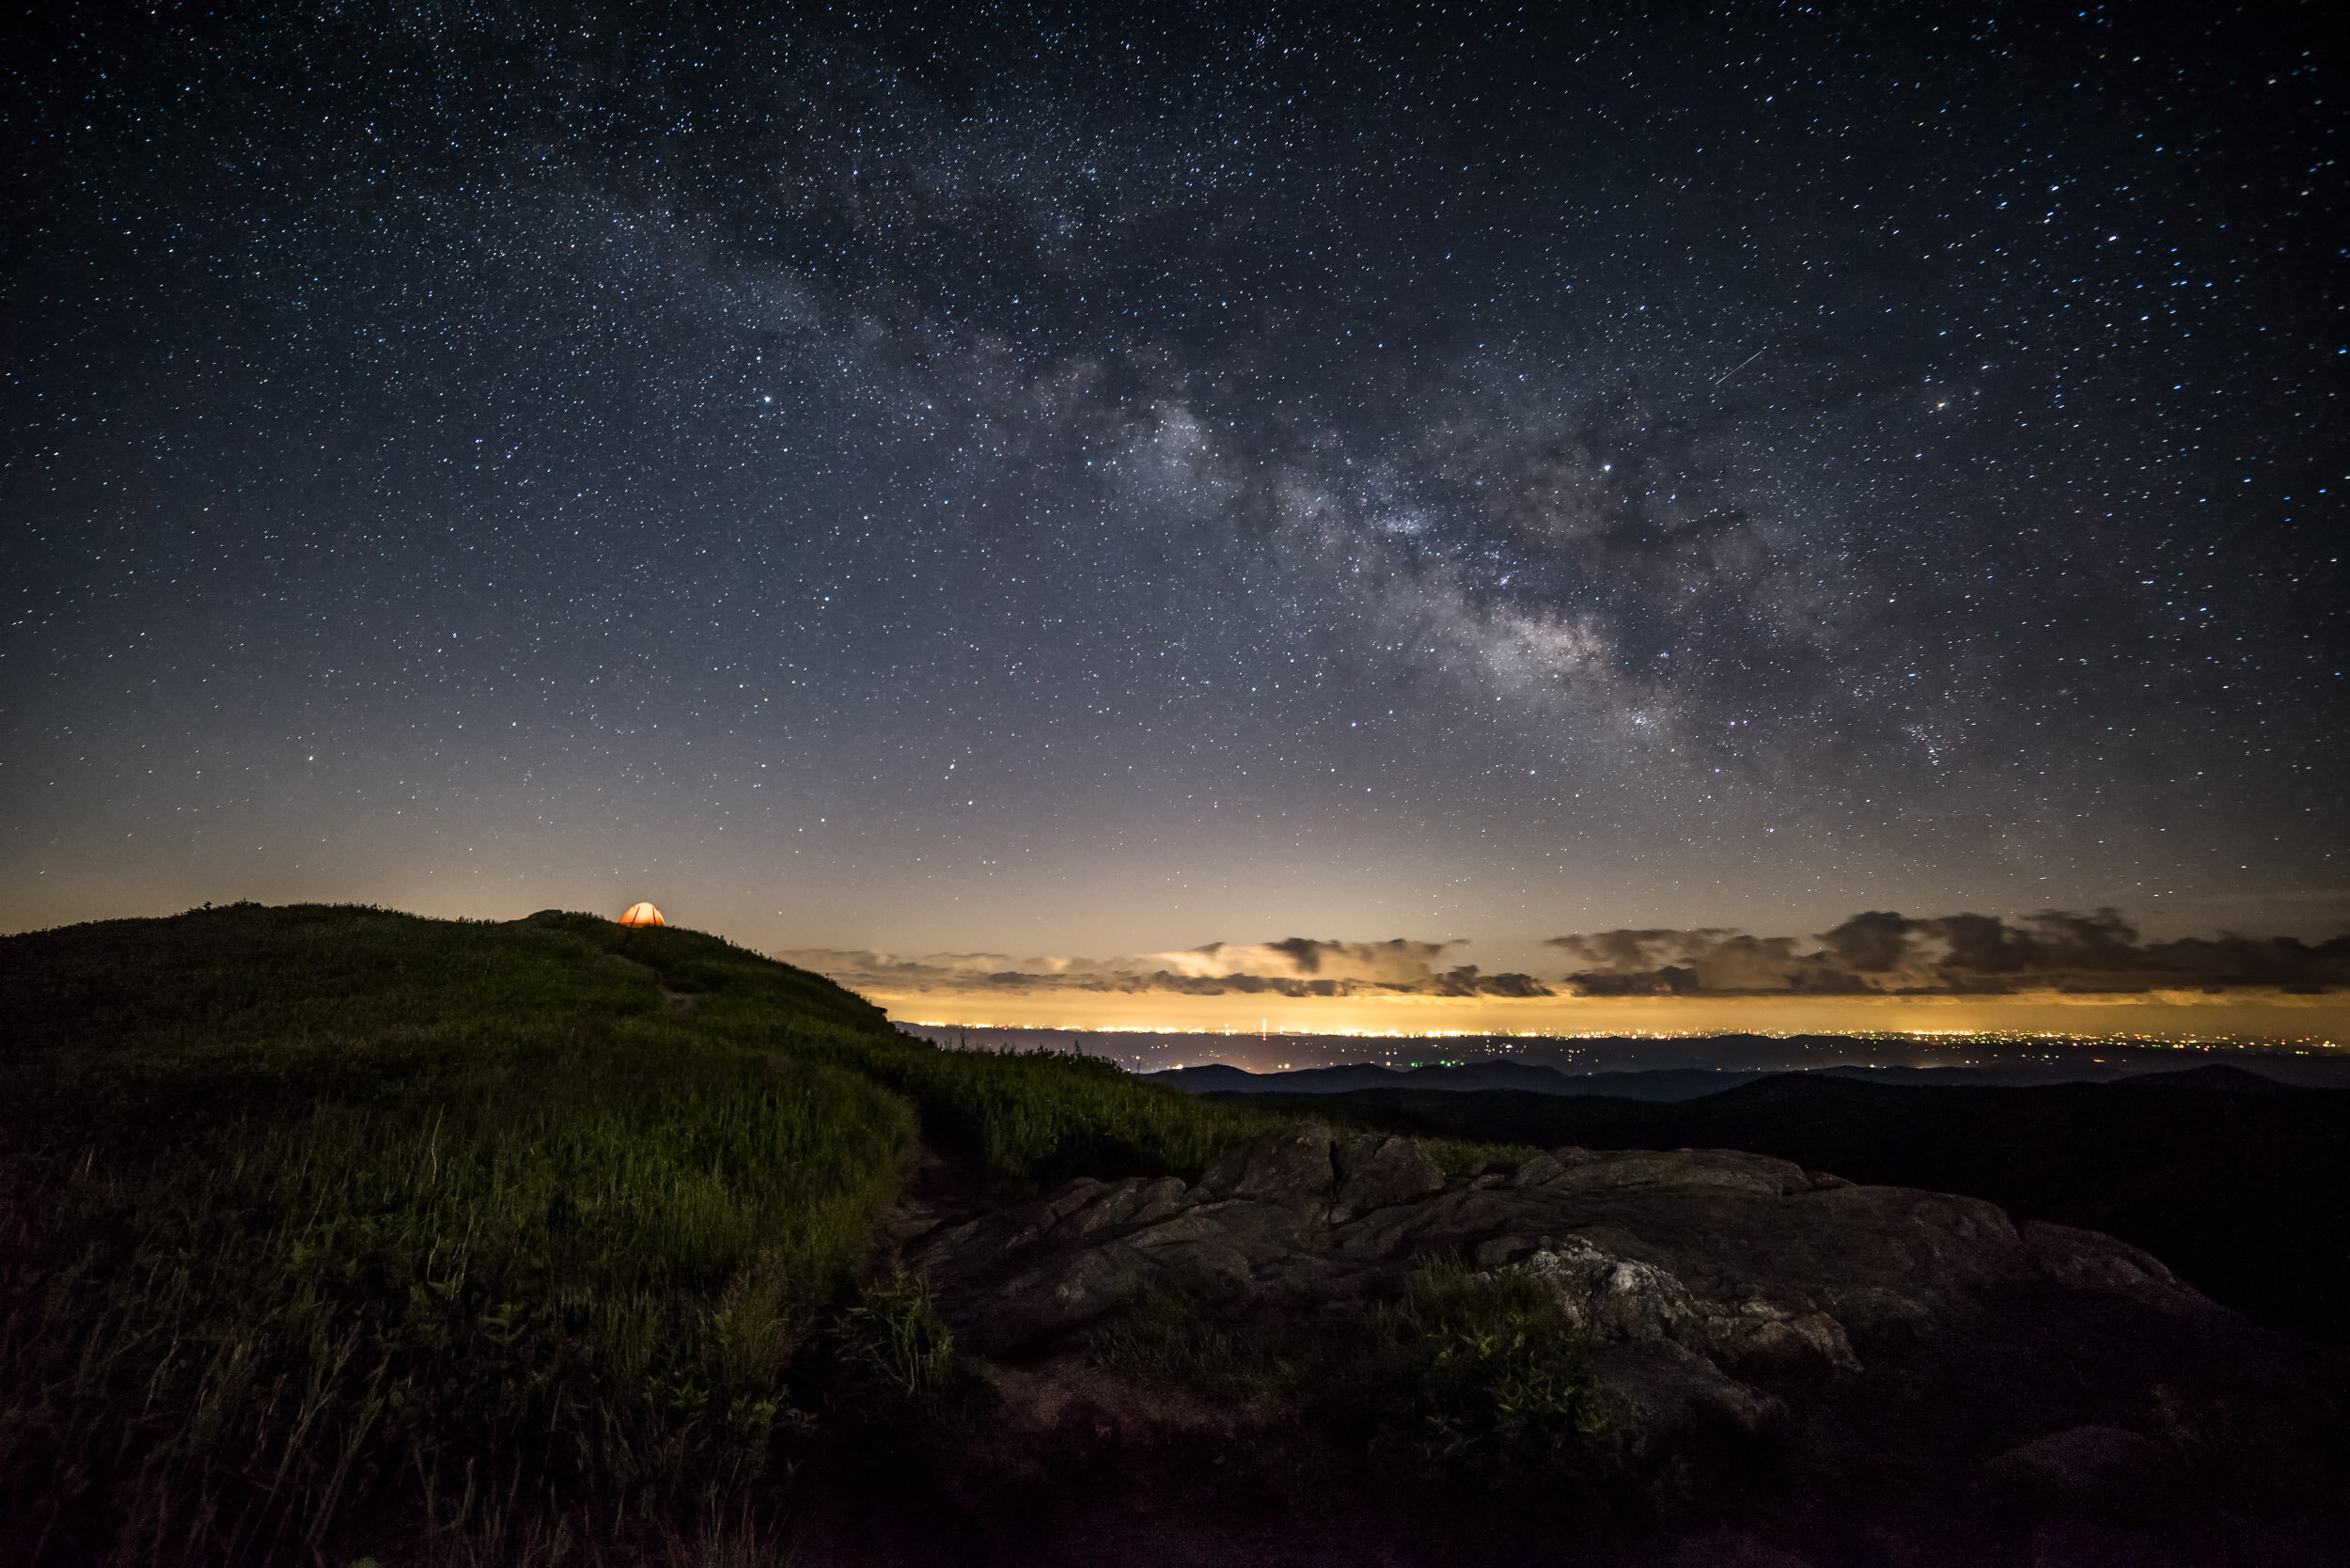
Finally one of the best reasons to camp out here is the night sky! While Brevard North Carolina creates some light pollution to the south the further you go, the darker the skies are. Perfect for capturing the Milky Way!

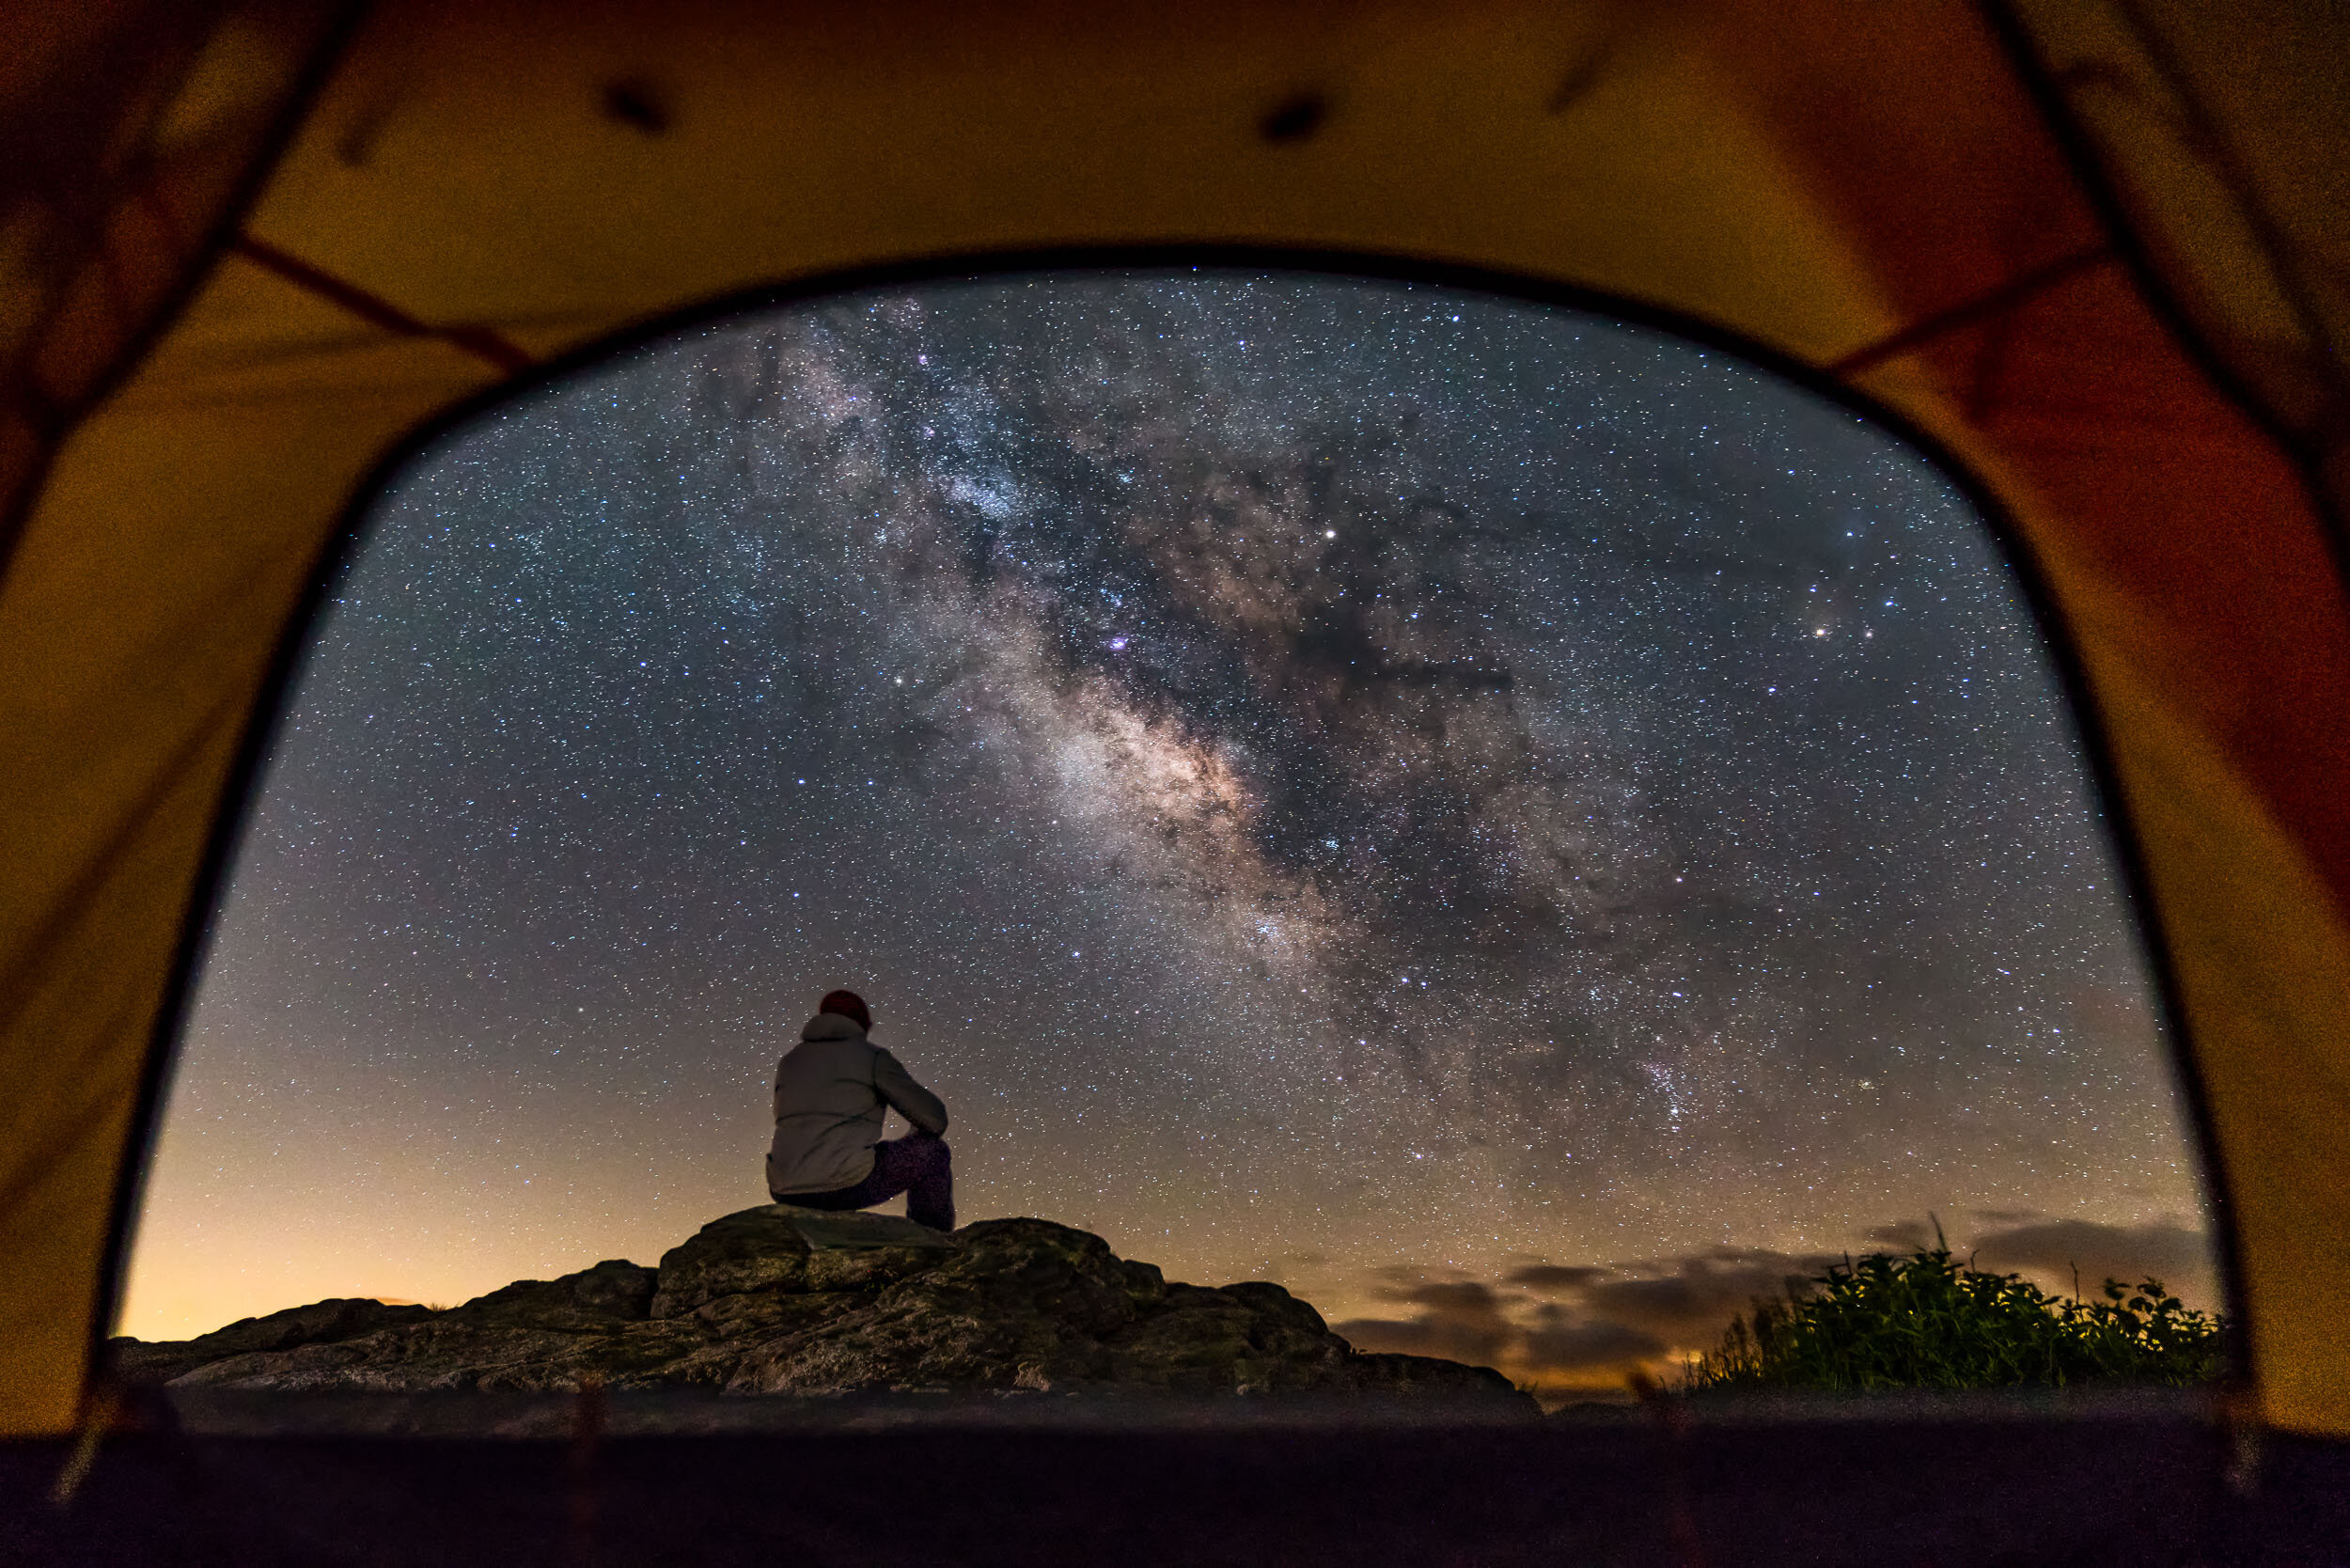
Feel free to contact me with any photography needs about the Art Loeb Trail or Black Balsam Knob area. It is a great location for outdoor product photography, adventurous portraits, and astrophotography!

Travel and Photography at Glacier National Park

My guess is Glacier National Park is going to be on any bucket list created of National Parks to visit and photograph. It definitely was on mine! This summer I finally had the chance to visit in July when the Going to the Sun Road was open but also kind of not…more on that later.

To see the most of the park you will want to stay in multiple locations. Glacier National Park is the 12th largest US National Park and the mountains you go to see make it difficult to get around. Therefore I recommend spending a few nights on each side of the park, east and west. On the east side the Many Glacier Hotel inside the park is amazing! The hotel is right on Swiftcurrent lake with beautiful sunset views but as you can expect it is popular and challenging to get a reservation. Fortunately nearby towns of Babb and St. Mary also have hotels and rental homes that are easier to book and only a short drive away. Similarly on the west side there is the Lake McDonald Lodge inside the park and the towns of Hungry Horse and Columbia Falls with many other options.

There are many photography options inside the park. Wildlife, stunning waterfalls, crystal clear lakes, and of course towering mountains. Many of these can be found right off the road or along moderate hikes. However those that like to really work for their reward will find many ~10 mile hikes to secluded glacial lakes.

The Going to the Sun Road is not to be missed but it is only open seasonally June to October. For these reasons it is very crowded and the park may have entry ticket requirements that can be difficult to obtain. To make it even worse when it is open many of the parking lots fill up before 7am! Therefore it is a challenge to get the most out of it. Photographers should be ok as we arrive before 7am for sunrise anyway and after 6pm it finally thins out to make parking for sunset possible. But if you are going to Logan Pass (the peak of the road) you can expect to wait 30 minutes for a parking spot to open up during the rest of the day.

It’s no help for me to say that there are great photos everywhere in the park…even if it’s true…so here is a list of some easy to photograph locations to get you started.

East Side

  1. Many Glacier Hotel - sunset, no hiking required.

  2. Wild Goose Island Lookout - anytime, no hiking required…but I highly recommend scrambling down to the lake shore.

  3. Sun Point Nature Trail - sunrise, easy hike.

  4. St. Mary Falls and Virginia Falls - moderate hike.

  5. Lake Logan Pass and Hidden Lake - anytime, easy hike.

  6. Two Dog Flats - bears oh my!

West Side

  1. Lake McDonald - sunrise when lake is calm.

    • Lake McDonald Lodge

    • Apgar Village

    • Apgar Amphitheater

  2. Trail of the Cedars to Avalanche Lake - moderate hike.

Enjoy! Questions, prints, or assignment needs please feel free to contact me.

Adapted 200mm f4 Lens Shootout

In search of a light, small, sharp telephoto lens for landscapes!

How much photography gear do you carry?  I’m always wanting to bring more than I can fit or carry and one big item that often gets left behind because it takes up a lot of space and weight is a telephoto lens.  So I’ve been searching for an option to use with my Sony A7 series cameras and here is my latest experiment…adapted manual focus 200mm f/4 primes.

For this experiment I went a bit wild on ebay and picked up three 200mm f/4 prime lenses that were often mentioned in various forums as being good cheap landscape lenses.  If you have never tried adapting older lenses I highly recommend it.  It is a great way to try out new focal lengths and satisfy that urge to buy new gear but at very low prices.  They are somewhat inconvenient with manual focus, no exif information, no lens stabilization, and requiring an adapter but for landscapes and creative exploration they are very useable.

From left to right: Nikon Ai-s Nikkor 200mm f/4 (1.38 lbs), Canon new FD 200mm f/4 (1.20 lbs), Sony 70-200 f/2.8 GM (3.26 lbs), and Olympus OM Zuiko MC Auto-T 200mm f/4 (1.35 lbs)

From left to right: Nikon Ai-s Nikkor 200mm f/4 (1.38 lbs), Canon new FD 200mm f/4 (1.20 lbs), Sony 70-200 f/2.8 GM (3.26 lbs), and Olympus OM Zuiko MC Auto-T 200mm f/4 (1.35 lbs)

I purchased these all from Japan in mint condition and unboxed them a week later and admired the solid construction and similar design of all three lenses.  The Olympus and Nikon felt nearly identical while the Canon was a bit lighter but the focus was a bit too loose for my taste which was concerning as the Canon was my initial preference due to the smallest size and lowest weight.

From left to right (filter size): Nikon Ai-s Nikkor 200mm f/4 (52mm), Canon new FD 200mm f/4 (49mm), Sony 70-200 f/2.8 GM (77mm), and Olympus OM Zuiko MC Auto-T 200mm f/4 (55mm)

From left to right (filter size): Nikon Ai-s Nikkor 200mm f/4 (52mm), Canon new FD 200mm f/4 (49mm), Sony 70-200 f/2.8 GM (77mm), and Olympus OM Zuiko MC Auto-T 200mm f/4 (55mm)

Unable to wait after unboxing I put all three to the test in my backyard and took images of the fence at f/4, f/8, and f/16.  The result?  Unfortunately the lighter Canon was the worst performer.  The Nikon and Olympus were very similar and even compared on par with the Sony 70-200 FE f/2.8 GM.

So I had found two 200mm f/4 lenses that I was happy with the image quality but holding them I started to doubt there was much to be gained in space/weight savings.  I looked up the Sony 70-300 FE f/4.5-5.6 specs and found the weight savings to be only a half a pound.  Therefore it looks like I will by buying the Sony 70-300 FE f/4.5-5.6 again but I’ll also keep the Nikon Ai-s Nikkor 200mm f/4.  I’m playing around with other Nikon f mount adapted lenses so as long as I have the adapter I’ll keep it and give it a try on my next hiking trip.

100% center crops below. Corners were not significantly different.

f/4: Left Olympus, Right Canon

f/4: Left Olympus, Right Canon

f/4: Left Olympus, Right Nikon

f/4: Left Olympus, Right Nikon

f/4: Left Sony, Right Nikon

f/4: Left Sony, Right Nikon

f/8: Left Olympus, Right Nikon

f/8: Left Olympus, Right Nikon

f/8: Left Nikon, Right Sony

f/8: Left Nikon, Right Sony